


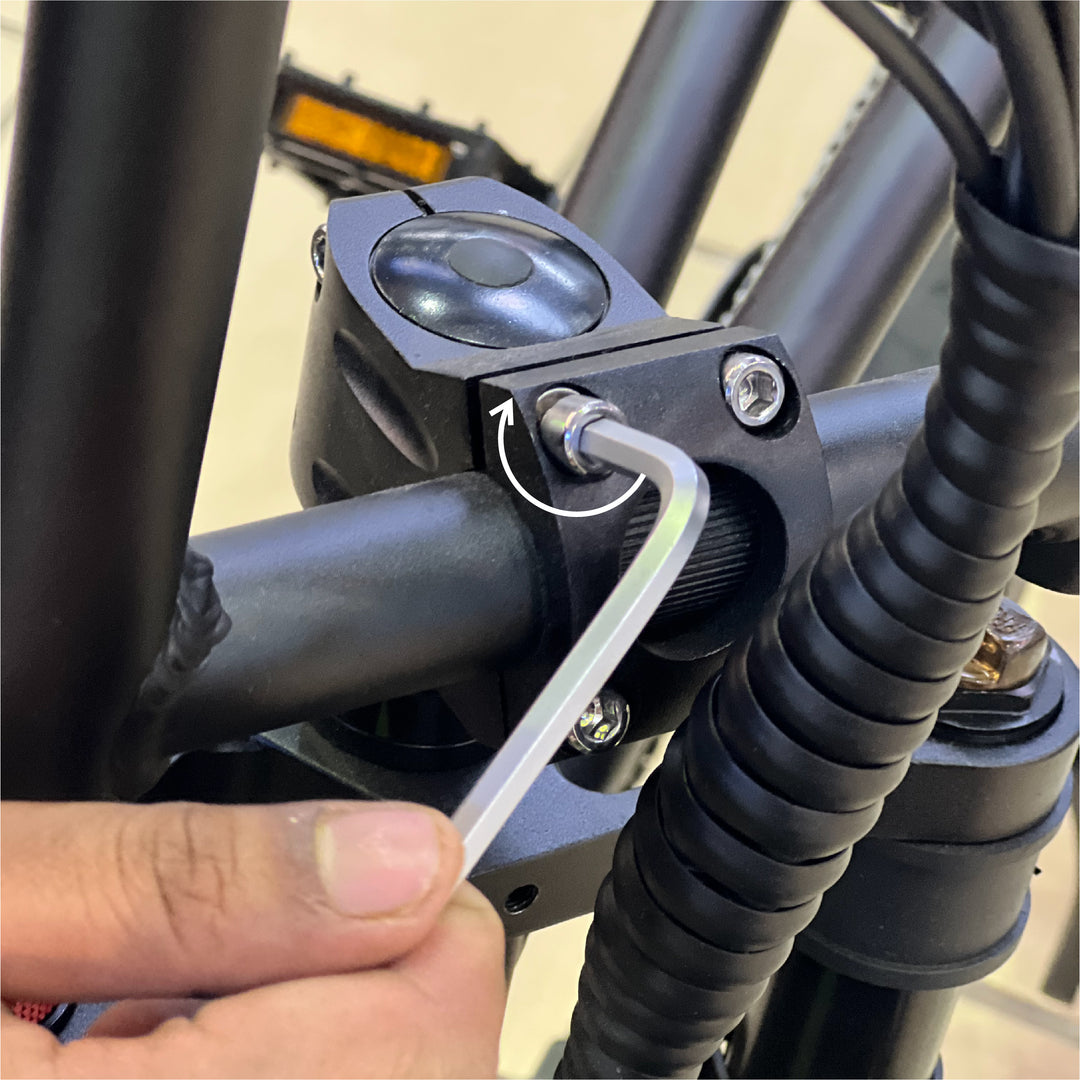
1. Handlebars
Use hex wrench to remove the bolts of the handlebar clamp.
Once the clamp is open, place the lower crossbar of the handlebar in the groove of the top crown.
Loosely tighten the handlebar clamp, and adjust the angle of the handlebar to riders comfort.
Cross tighten the handlebar clamp from corner to corner making sure the clamp is evenly placed, tight, and handlebars do not move.
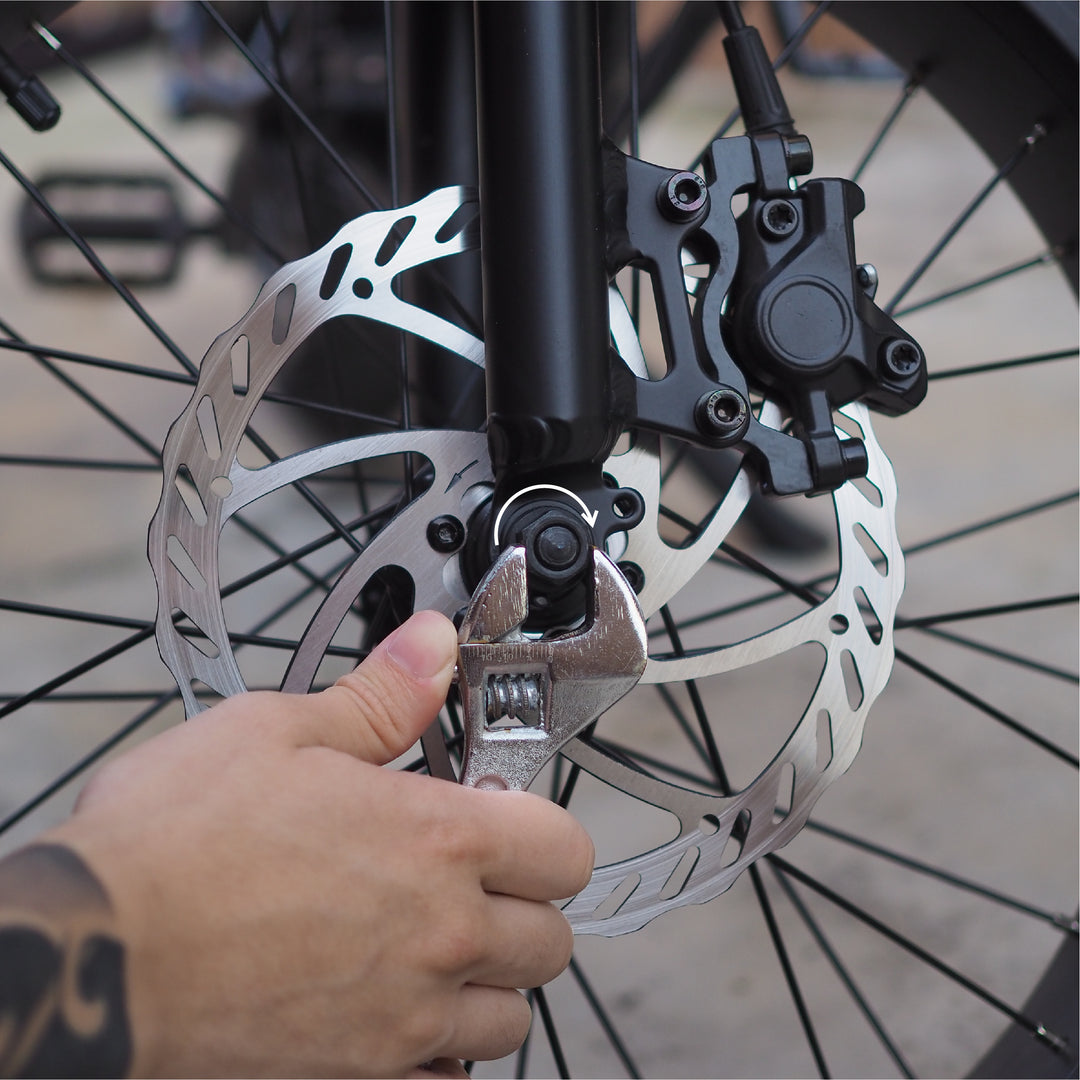
2. Front Wheel
Remove the shipping spacer, bolt and nut from the front wheel fork.
Insert the front wheel in between the forks while positioning the front brake disc in the brake caliper.The disk rotors are sharo, take precaution while working with or close to them.
Place a washer onto the axle on the outside of the forks. Install and hand-tighten the two adjustment nuts equally. Use the supplied 15 mm socket and 15 mm wrench to finish tightening the adjustment nuts, being sure each nut is tightened equally on both sides.
The adjustment nuts must be very tight; be sure to retighten them after your first two rides.
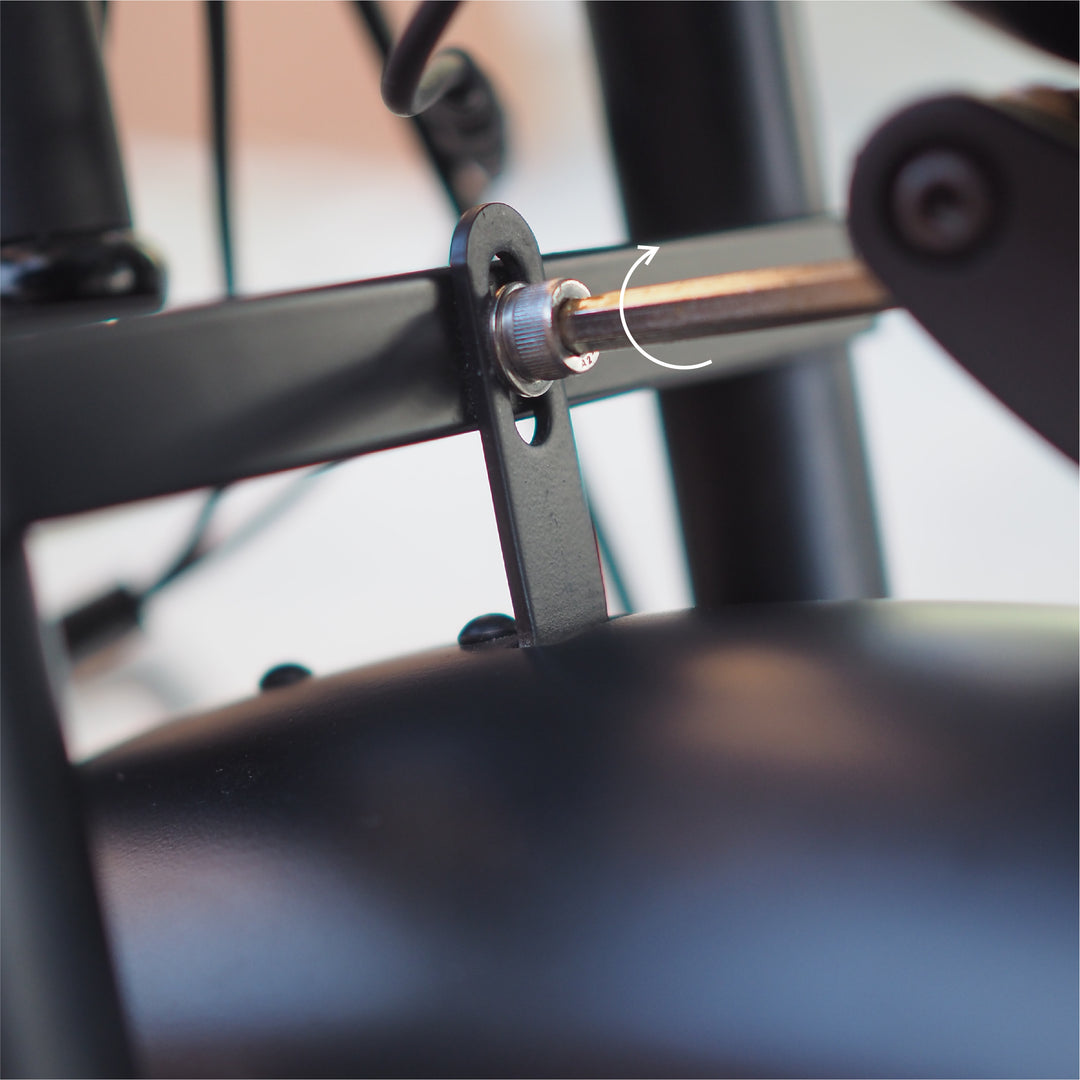
3. Mud Guard
Place mud guard below lower crossbar of the front fork.
Insert and secure bolt with hex wrench. Bolt must be very tight to prevent rattling.
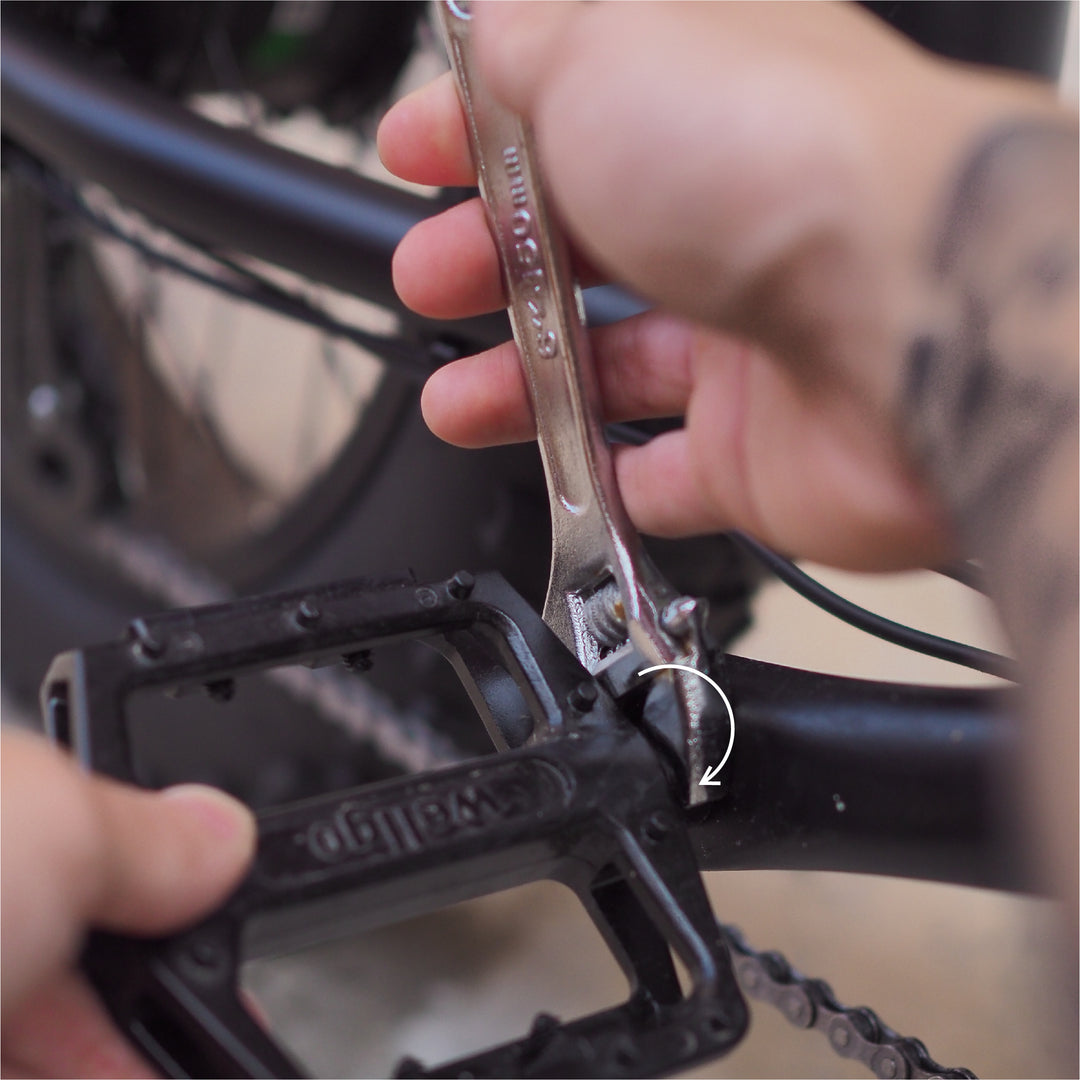
4. Pedals
Identify the left and right markings on the pedals. Be sure to install the pedals on their respective side. L and R indicators are located on the underside of pedals.
(left pedal tighten counter-clockwise to install)
While keeping the pedal horizontal, carefully hand-start the threads of the pedal into the crank arm.
Finish tightening the pedals using the supplied 15 mm wrench. The pedals must be very tight. Check and retighten the pedals after your first two rides.
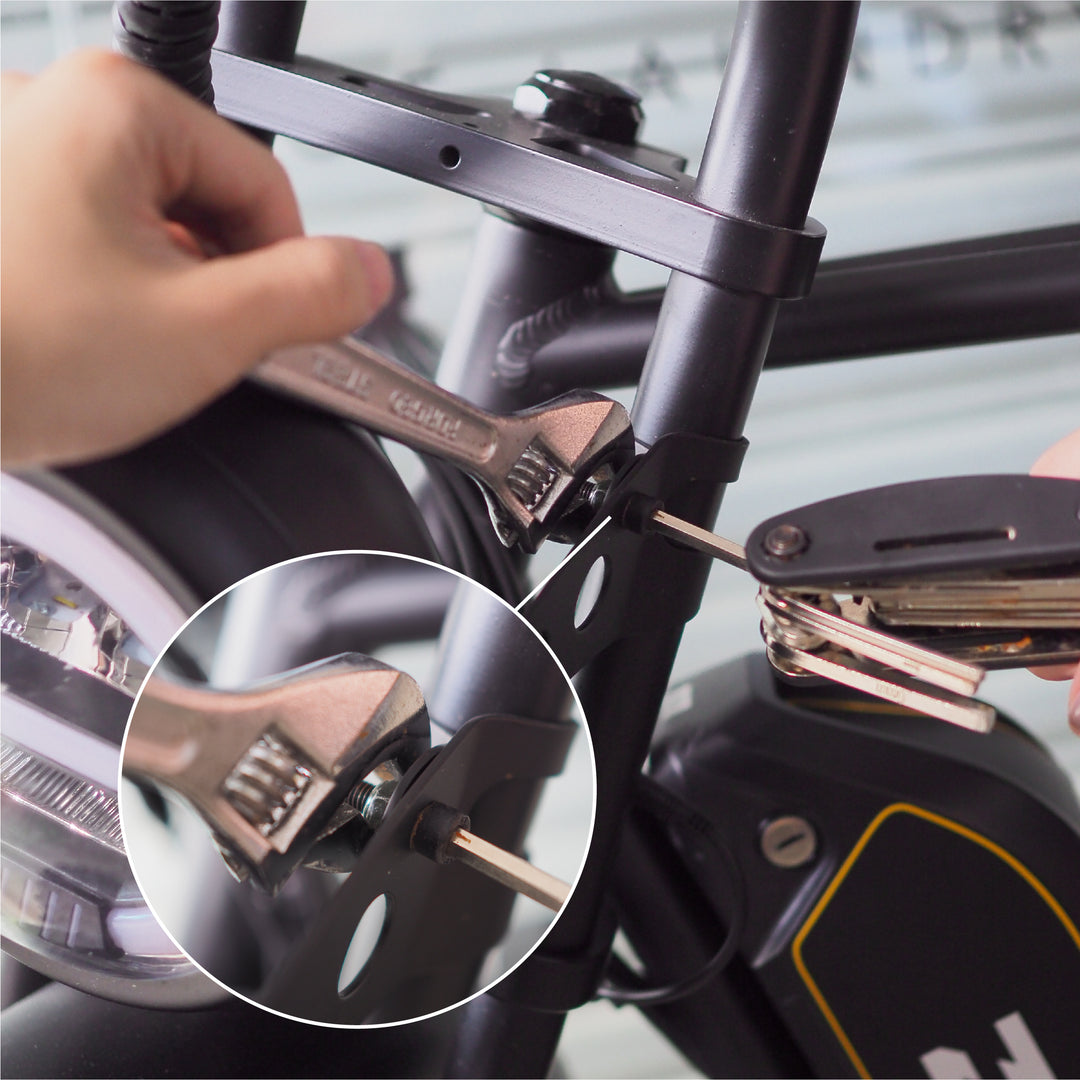
5. Headlight bracket
Install headlight bracket onto fork below first crossbar.
Place inner and outer segment of brackets onto post then insert screws.
The brackets are secured with lock nuts, use a hex wrench and a live wrench to tighten the lock nuts, you will need to use substantial force to tighten the lock nuts into place.
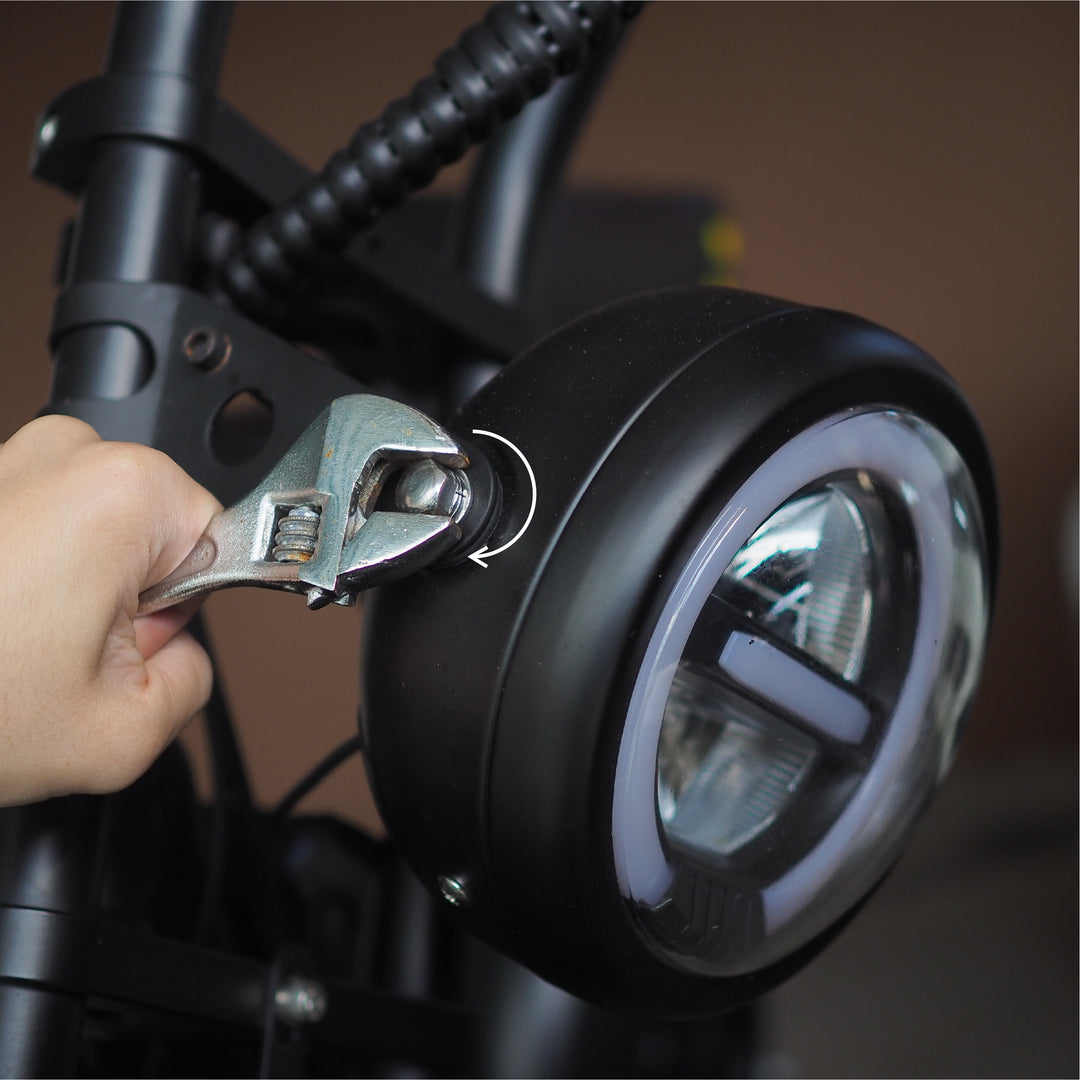
6. Headlight
Once the brackets are installed on both side of the fork, place headlight unit in-between the brackets and secure onto bracket with given screws.
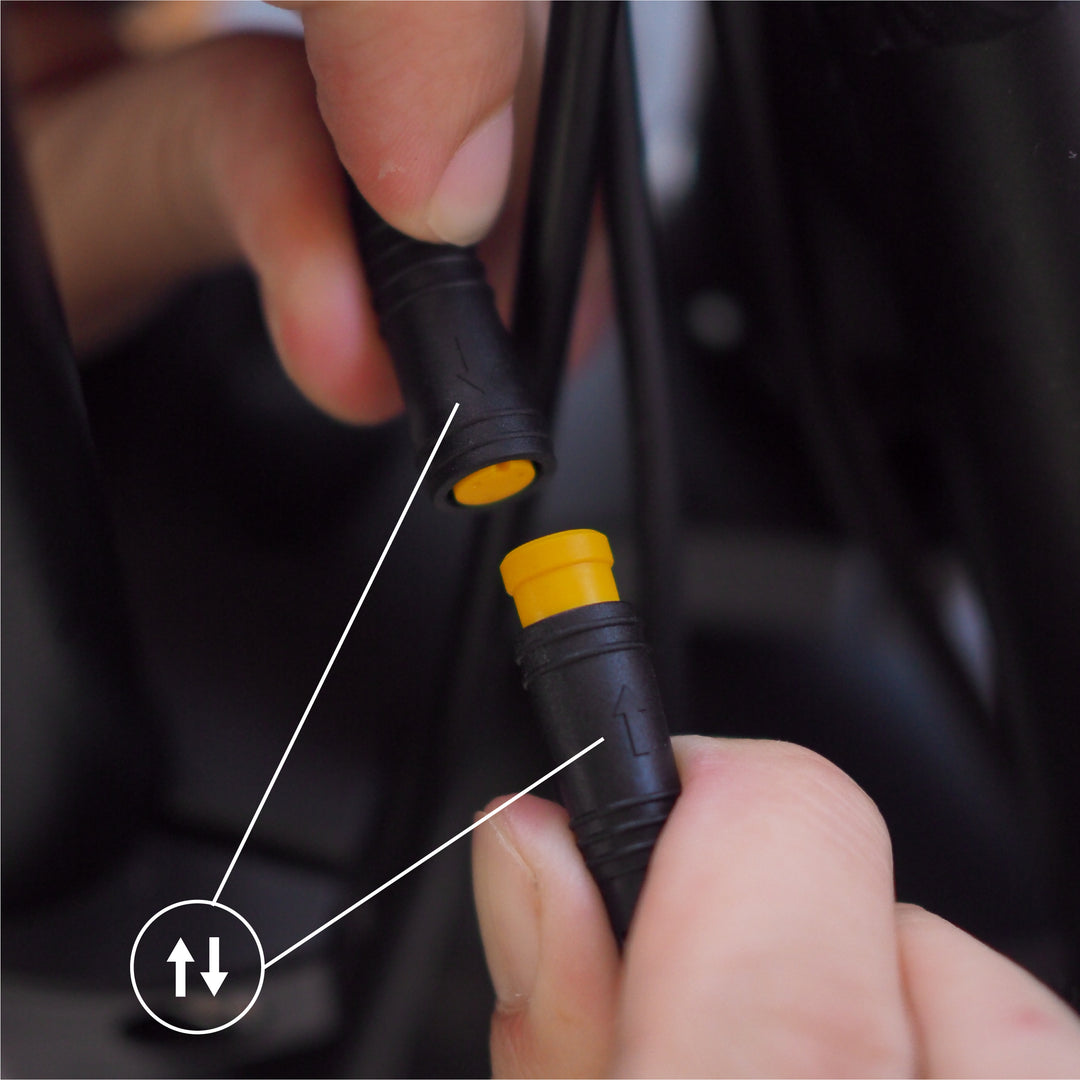
7. Connect
Once headlight is installed, connect the yellow higo plug to controller by aligning arrows on both ends and pushing into place. The headlight is ready for use.

8. Battery
Slide battery into mount and push until it clicks.
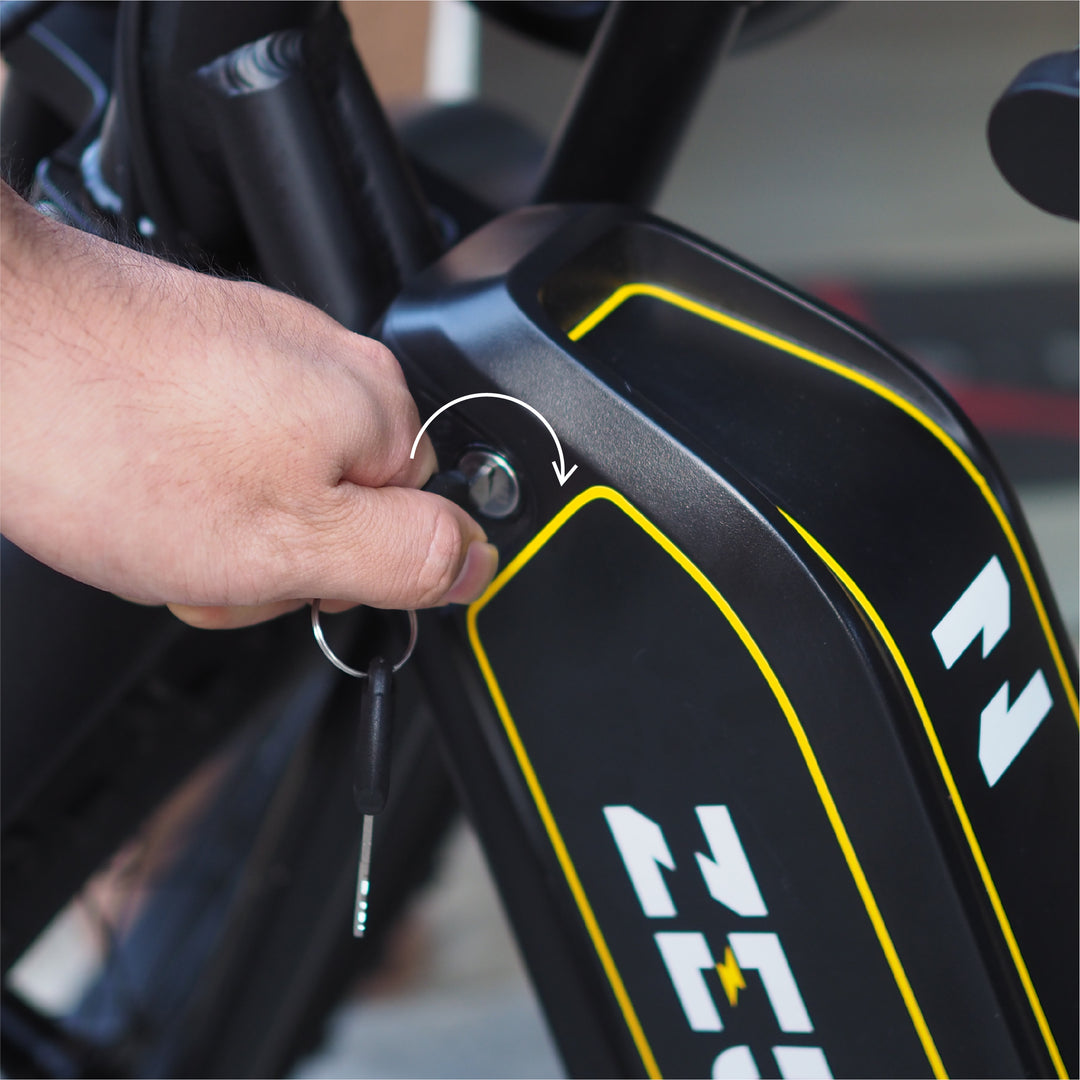
9. Lock The Battery
Insert and turn key to lock in place.
(Make sure to lock the battery and remove the key before riding)
Power on the battery and enjoy your ride.